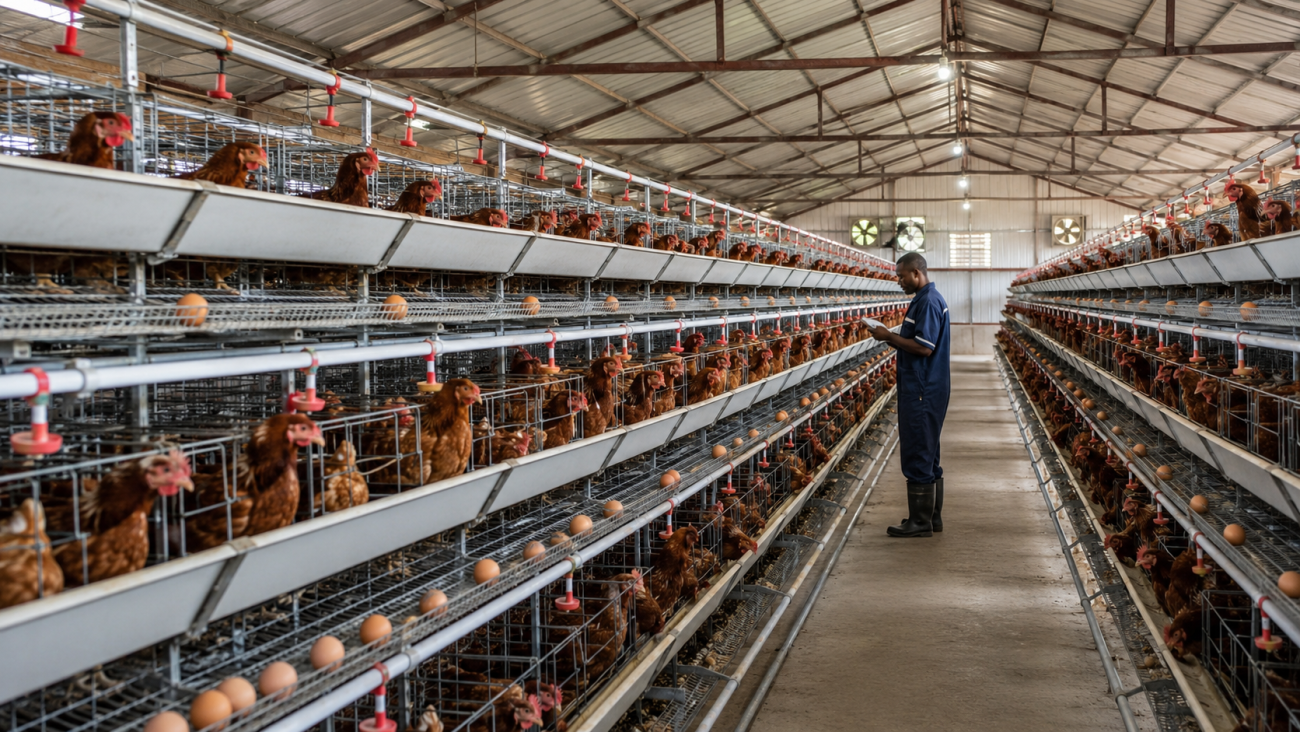
If you’re a poultry farmer—whether just starting with a backyard flock or scaling a commercial operation—one factor will directly impact your success: your chicken house design layout. A well-planned layout isn’t just about “housing chickens”—it’s about optimizing space, promoting animal welfare, boosting productivity (think higher egg production or faster weight gain), and reducing operational costs. Worse, a poorly designed layout leads to overcrowding, disease outbreaks, poor ventilation, and frustrated farmers.
In this guide, we’ll break down the essentials of a functional chicken house design layout, tailored to different farm sizes, key principles to follow, smart IoT integrations (a game-changer for modern farms!), real-world case studies, and common mistakes to avoid. By the end, you’ll have a clear roadmap to create a layout that works for your chickens and your bottom line—plus how Guangxi IoT’s solutions can take your setup to the next level.
Why Chicken House Design Layout Matters (More Than You Think)
Before diving into the details, let’s emphasize why getting your layout right is non-negotiable:
- Animal Health & Welfare: Chickens thrive in clean, well-ventilated, and spacious environments. A thoughtful layout reduces stress, minimizes disease spread (e.g., from contaminated bedding or poor air quality), and ensures access to food, water, and resting areas for every bird.
- Productivity: Happy, healthy chickens lay more eggs (up to 10-15% higher production!) and gain weight more efficiently. A layout that eliminates bottlenecks (e.g., overcrowded feeders) saves time and reduces waste.
- Operational Efficiency: A logical layout makes chores like feeding, cleaning, and collecting eggs faster and easier. For commercial farms, this translates to lower labor costs and smoother daily operations.
- Scalability: A well-designed layout can grow with your farm. Whether you’re adding 50 more chickens or expanding to a multi-house operation, starting with a flexible design avoids costly renovations later.
For small-scale farmers, this might mean fewer vet bills and more consistent egg harvests. For commercial operations, it could mean thousands in saved costs and increased revenue. Either way, your layout is the foundation of a successful poultry farm.
Key Principles of a High-Performing Chicken House Design Layout
No matter the size of your farm, these core principles should guide your layout planning. They’re rooted in chicken behavior and practical farming needs—plus, they align with industry best practices for sustainability and productivity.
1. Prioritize Ventilation (The #1 Critical Factor)
Chickens produce ammonia (from waste) and moisture (from breathing and droppings), which can quickly build up and cause respiratory issues, skin infections, or mold growth. Your layout must prioritize consistent, effective ventilation:
- Natural Ventilation: For small to medium farms, design your chicken house with cross-ventilation in mind. Position windows, vents, or open sides on opposite walls to allow fresh air to flow through. Install adjustable shutters to control airflow during cold weather.
- Mechanical Ventilation: For commercial or large-scale houses (200+ chickens), use exhaust fans and intake vents. Place fans at one end and intake vents at the other to create a steady air current. Aim for 0.5-1 cubic foot per minute (CFM) of air per chicken—adjust based on age (chicks need more gentle airflow than adults).
Pro Tip: Integrate IoT temperature and humidity sensors (like those from Guangxi IoT) to monitor air quality in real time. These sensors trigger alerts if ammonia levels or humidity spike, ensuring you adjust ventilation before issues arise.
2. Optimize Space Allocation (Avoid Overcrowding)
Overcrowding is the #1 cause of stress, aggression, and disease in flocks. Follow these space guidelines for your chicken house design layout:
- Backyard/Small Farms (20-50 chickens): 2-3 square feet per chicken inside the house + 8-10 square feet per chicken in an attached run.
- Medium Farms (50-200 chickens): 1.5-2 square feet per chicken indoors (if using cages) or 2-3 square feet (free-range style) + 6-8 square feet in a run.
- Commercial Farms (200+ chickens): 1-1.5 square feet per chicken in cage systems (with automated feeding/watering) + proper spacing for equipment.
When planning, map out “traffic flow” for chickens—ensure there’s no bottleneck around feeders, waterers, or nesting boxes. Leave 2-3 feet of clear space down the center of the house for your own movement (cleaning, collecting eggs).
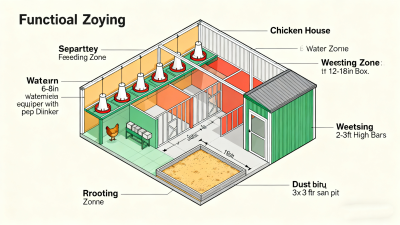
3. Functional Zoning (Separate Areas for Different Needs)
Chickens have distinct needs: eating, drinking, nesting, roosting, and dust-bathing. A good layout separates these zones to prevent competition and keep the house clean:
- Feeding Zone: Place feeders 6-8 inches off the ground (to reduce waste from scratching) and space them 10-12 feet apart. For commercial farms, use automated feed lines along the length of the house—position them so every chicken can access food without crowding.
- Watering Zone: Waterers should be near feeders but not directly under them (to avoid contamination). Use nipple drinkers (best for reducing spillage) or troughs, and ensure 1 inch of watering space per chicken.
- Nesting Zone: For egg-laying flocks, place nesting boxes in a quiet, dark corner of the house (chickens prefer privacy!). Aim for 1 box per 4-5 hens, lined with clean straw or shavings. Elevate boxes 12-18 inches off the ground to keep them clean.
- Roosting Zone: Chickens sleep off the ground to avoid predators and cold. Install roosting bars (2×4 inches, rounded edges) 18-24 inches apart and 2-3 feet off the ground. For large flocks, stack roosts in tiers (no more than 3 tiers) with 12 inches of space between tiers.
- Dust-Bathing Zone: Chickens dust-bathe to control mites and keep feathers clean. Allocate a 3×3 foot area with dry sand, wood ash, and diatomaceous earth—indoors or in the run.

4. Lighting & Temperature Control
Lighting affects egg production (hens need 14-16 hours of light daily) and chicken behavior. Your layout should account for both natural and artificial light:
- Natural Light: Install large windows or skylights (10-15% of the floor area) to maximize sunlight—this reduces energy costs and improves chicken mood.
- Artificial Light: Use LED bulbs (energy-efficient!) on timers for winter months or indoor-only houses. Position bulbs evenly to avoid dark spots.
Temperature is equally important: chicks need 95°F (35°C) in their first week, dropping 5°F weekly until reaching 70°F (21°C). Adult chickens thrive at 60-75°F (15-24°C). Design your layout with insulation (walls and roof) to retain heat in winter, and use shade cloths or fans in summer. IoT temperature sensors can automate heating/cooling systems—saving you time and ensuring consistent conditions.
Tailored Chicken House Design Layouts for Different Farm Sizes
Your layout will vary based on how many chickens you raise and your farming goals (egg production, meat, or backyard hobby). Below are practical examples—including real-world case studies—for common farm sizes:
1. Backyard/Small-Scale Layout (20-50 Chickens)
Ideal for hobby farmers or those selling eggs locally, this layout is simple, cost-effective, and focused on free-range or semi-free-range living:
- House Dimensions: 8×10 feet (indoors) + 10×15 feet (attached run).
- Layout Flow:
- Entrance door on one end (for you) + a small chicken door (12×12 inches) leading to the run.
- Nesting boxes (4-6 total) along the back wall (quiet, dark).
- Roosting bars above the nesting boxes (to save space).
- Feeders and waterers along the side wall (away from nesting boxes to avoid contamination).
- Dust-bathing area in the run (covered to protect from rain).
- Key Features: Use a “mobile chicken coop” design if you want to rotate the run (reduces grass damage and parasite buildup). Add a small storage shelf for feed and bedding near the entrance.
Real-World Case Study: Urban Vertical Chicken Coop (25 Chickens)
A city farmer in a suburban area with a 10×12-foot backyard implemented a vertical layout to maximize space . The design included:
- Dimensions: 6×8-foot ground-level run + 4×6-foot two-story coop (total indoor space: 24 square feet).
- Vertical Zoning: Bottom floor (nesting boxes and dust-bathing area), top floor (roosting bars and feeding station) connected by a ramp.
- IoT Integration: Guangxi IoT’s compact temperature-humidity sensors installed in both floors, paired with a small exhaust fan. The fan activates automatically when humidity exceeds 60%, preventing moisture buildup in the enclosed vertical space.
- Result: The farmer reports zero respiratory issues in the flock, consistent egg production (18-20 eggs/day), and easy maintenance—all in a space that would traditionally hold only 10 chickens.
Bonus Small-Scale Example: Amish-Inspired Coop (12 Chickens)
A beginner farmer opted for a 6×6-foot Amish-style coop , featuring:
- Externally mounted nesting boxes (3 total) for easy egg collection without entering the coop.
- Built-off-the-ground design (18 inches high) for better ventilation and predator protection.
- Solar-powered LED lights (connected to Guangxi IoT’s smart timer) to extend daylight hours in winter, boosting egg production by 12%.
2. Medium-Scale Layout (50-200 Chickens)
For farmers scaling up to sell eggs or meat locally, this layout balances space and efficiency:
- House Dimensions: 16×24 feet (indoors) + 20×30 feet (run) or pasture access.
- Layout Flow:
- Central aisle (3 feet wide) running the length of the house for easy access.
- Feeding and watering zones: Automated feed troughs and nipple drinkers along both sides of the aisle.
- Nesting boxes: Wall-mounted units (15-20 boxes) along one end of the house, with a collection shelf for easy egg gathering.
- Roosting bars: Tiered roosts along the opposite end (3-4 tiers, spaced 12 inches apart).
- Ventilation: Windows on both side walls + a ridge vent (along the roof) for natural airflow; small exhaust fans for hot weather.
- Key Features: Add a manure pit or removable trays under roosting areas for easy cleaning. Use fencing around the run to protect from predators (foxes, raccoons).
Real-World Case Study: 10,000-Broiler Medium-Scale Farm
A family-owned farm in central China implemented a medium-scale layout for 10,080 broilers, with:
- Dimensions: 72x8x4 meters (indoor area: 576 square meters) + no attached run (indoor-only with automated systems).
- Cage Layout: 2 rows of 4-tier A-type broiler cages (35 sets per row), with 508 cm² of space per bird.
- Functional Zones: Automated feed lines above the cages, nipple drinker rows between cage tiers, and conveyor belts under cages for manure removal.
- IoT Integration: Guangxi IoT’s ammonia sensors placed every 10 meters along the central aisle, paired with tunnel ventilation fans. When ammonia levels exceed 20 ppm, fans speed up automatically. Feed consumption sensors track daily intake, alerting the farmer to refill supplies before shortages occur.
- Result: 98% flock survival rate, 7% faster weight gain compared to their old layout, and 30% less labor time spent on feeding/cleaning.
3. Commercial-Scale Layout (200+ Chickens)
Designed for maximum productivity and minimal labor, commercial layouts rely on automation and IoT integration:
- House Dimensions: 40×100 feet (or larger) with a clear-span roof (no internal pillars) for equipment access.
- Layout Flow:
- Automated systems: Conveyor belts for manure removal, overhead feed lines, and nipple drinker rows (spaced every 8-10 feet).
- Nesting boxes: Large banks of roll-out nesting boxes (1 per 5 hens) with automated egg collection belts.
- Ventilation: Tunnel ventilation (large fans at one end, intake vents at the other) + evaporative coolers for summer.
- Lighting: LED panels on timers, evenly spaced to ensure 14-16 hours of light.
- IoT integration: Sensors for temperature, humidity, ammonia, and feed levels—connected to a central dashboard (like Guangxi IoT’s poultry monitoring system) for real-time alerts and remote control.
- Key Features: Separate entry and exit points for workers and equipment to reduce disease spread. Install biosecurity measures (footbaths, disinfection stations) at the entrance.

Real-World Case Study: 20,000 Free-Range Broiler Farm (Philippines)
A commercial farm in the Philippines implemented a free-range brooding system for 20,000 chickens, with:
- Dimensions: 100x15x5 meters (single house) + 5,000-square-meter pasture access.
- Innovative Layout: High-top plastic slatted floors (allowing manure to fall through, reducing bacteria growth) + 5 zones of roosting bars and feeding stations.
- Ventilation: Hybrid system (natural cross-ventilation via adjustable side walls + mechanical exhaust fans for hot days).
- IoT Integration: Guangxi IoT’s central monitoring platform connected to 20+ sensors (temperature, humidity, ammonia, and pasture grass height). The system automates:
- Feeder movement to fresh pasture areas when grass height drops below 3 inches.
- Ventilation adjustments when ammonia levels exceed 15 ppm.
- Heater activation for chicks (maintaining 95°F in brooding zones).
- Result: 97% bird health rate, compliance with local animal welfare laws, and 40% reduction in labor costs due to automation.
Bonus Commercial Example: 1.8 Million Broiler Farm (Inner Mongolia)
A large-scale farm in China used a duplex chicken house design for 1.8 million broilers:
- Dimensions: 18 chicken houses (each 186×12.2×5.6 meters), 5 rows of 3+3-tier H-type cages per house.
- Layout: Two-story structure with perforated iron mesh floors for airflow, automated feed lines, and manure conveyor belts.
- IoT Integration: Guangxi IoT’s enterprise-grade platform monitors all 18 houses, with real-time data on temperature, feed levels, and flock activity. Alerts are sent to managers’ phones for issues like equipment malfunctions or temperature spikes.
- Result: 8% higher feed conversion rate, 24/7 remote management, and consistent production across all houses.
Smart Upgrade: Integrate IoT into Your Chicken House Design Layout
Modern poultry farming is all about data-driven decisions—and IoT (Internet of Things) technology can transform a good layout into a great one. Here’s how to integrate IoT tools from Guangxi IoT into your chicken house design:
- Environmental Monitoring: Install sensors for temperature, humidity, ammonia, and CO2. These sensors sync to your phone or computer, so you can check conditions from anywhere. If ammonia levels rise (a sign of poor ventilation), you’ll get an alert to adjust fans or clean the house.
- Automated Controls: Connect sensors to automated systems (ventilation fans, heaters, coolers, feeders). For example, if the temperature drops below 60°F, the heater turns on automatically—no need for manual checks.
- Feed & Water Management: IoT-enabled feeders and waterers track consumption rates. You’ll know when to refill supplies and can identify if a group of chickens is eating less (a sign of illness).
- Egg Production Tracking: For commercial farms, IoT systems can count eggs, track laying rates, and identify underperforming hens—helping you optimize your flock.
The best part? Guangxi IoT’s solutions are designed to fit any farm size—from small backyard setups to large commercial operations. By integrating IoT into your chicken house design layout, you’ll save time, reduce waste, and ensure your chickens are always in optimal conditions.
Common Chicken House Design Layout Mistakes to Avoid
Even with the best intentions, it’s easy to make mistakes that hurt your flock and your farm. Here are the top pitfalls to steer clear of:
- Overcrowding: Skimping on space to fit more chickens leads to stress, aggression, and disease. Stick to the space guidelines above—your chickens (and your productivity) will thank you.
- Poor Ventilation: Ignoring airflow because of “cold weather fears” is a mistake. Even in winter, chickens need fresh air—use adjustable vents or insulated fans to keep air moving without drafts.
- Misplaced Feeders/Waterers: Placing feeders under roosts leads to contamination from droppings. Waterers near nesting boxes cause moisture buildup (bad for eggs!).
- Inadequate Nesting Boxes: Too few nesting boxes lead to eggs laid on the floor (broken or dirty). Place boxes in a quiet area—chickens won’t use boxes in high-traffic zones.
- Ignoring Predator Protection: For outdoor runs, use hardware cloth (not chicken wire) to keep out small predators like mice or snakes. Bury fencing 6 inches underground to deter digging animals.
- No Scalability: Designing a layout that’s “just enough” for your current flock means you’ll have to rebuild when you expand. Leave extra space for additional feeders, nesting boxes, or IoT equipment.
Conclusion: Your Chicken House Layout = Your Farm’s Success
A well-planned chicken house design layout isn’t a “nice-to-have”—it’s a must-have for any poultry farmer looking to raise healthy chickens, boost productivity, and save time. By following the principles of ventilation, space allocation, functional zoning, and smart IoT integration—plus learning from real-world case studies—you’ll create a setup that works for you and your flock.
Whether you’re a backyard hobbyist or a commercial farmer, Guangxi IoT is here to help. Our range of poultry monitoring sensors, automated controls, and data-driven tools are designed to take your chicken house layout to the next level—reducing labor, minimizing risks, and maximizing returns.
Ready to design a chicken house layout that delivers results? Visit guangxiniot.com today to explore our IoT poultry solutions, download our free layout planning checklist, or get expert advice tailored to your farm’s needs. Your chickens (and your bottom line) will thank you.
Bonus Tip: Share this guide with fellow farmers, and tag us in your chicken house setup photos on social media—we love seeing how our community uses smart IoT tools to build better farms!